RPSN
New member
I’ve created this topic as it’ll be easier to refer to if need be regarding the aluminium upper and lower coolant outlet pipes.
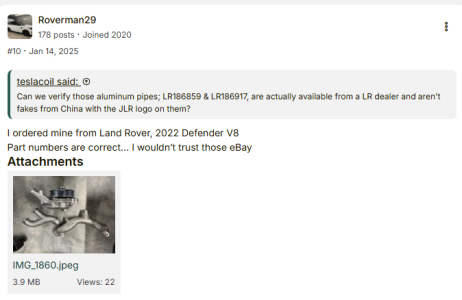
During a recent discussion on this forum (Coolant Leakage Plastic Pipes) https://www.ftypeforums.co.uk/viewtopic.php?t=9031 member Crezzer posted...
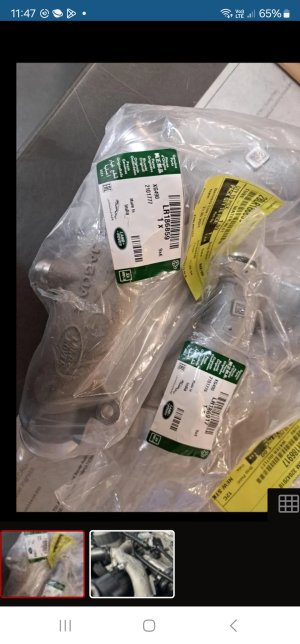
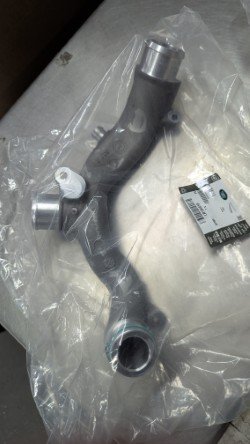
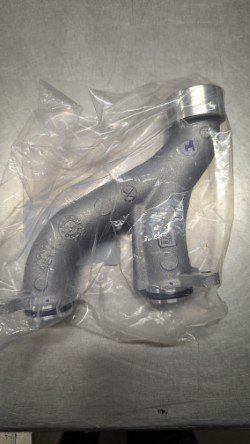
This included a photo of the OEM Land Rover aluminium upper and lower coolant outlet pipes with part numbers LR186859 and LR186917 (see first pic below). After seeing this I checked the LR part numbers with a Jaguar main dealer parts department who informed me that they crossover with and are suitable for the Jaguar F-Type including my own. The prices they gave me are:
Part number LR186859 £140.05 inc VAT.
Part number LR186917 £57.05 inc VAT. This part is currently on back order and the estimated time of arrival (ETA) is in April 2025.
They couldn’t confirm what material the parts are made of (aluminium or plastic) as that information wasn’t available to them. However, the image that member Crezzer provided clearly shows they are made of aluminium. If the information that the main dealer has given me is correct I’d consider buying these parts if I ever needed them.
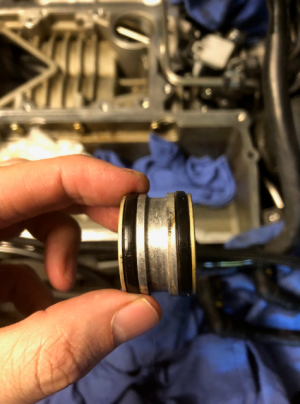
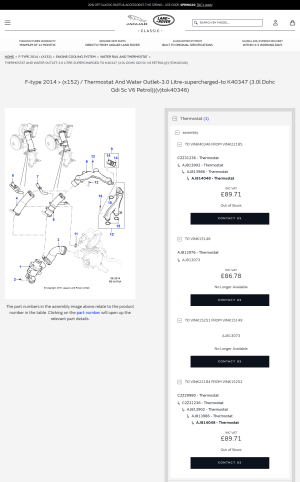
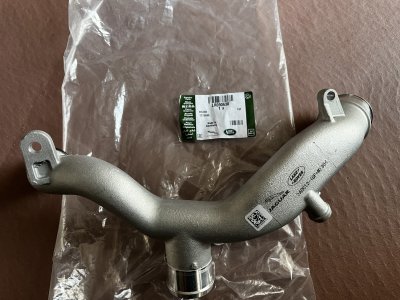
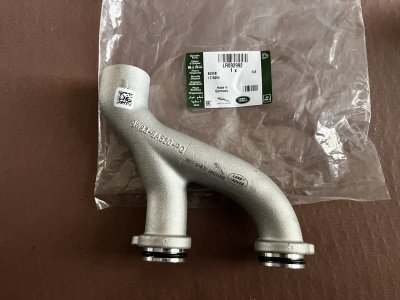
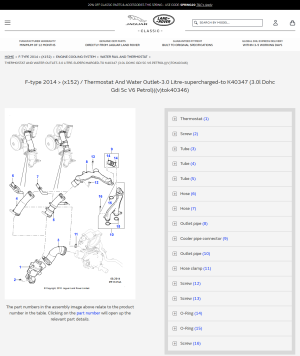
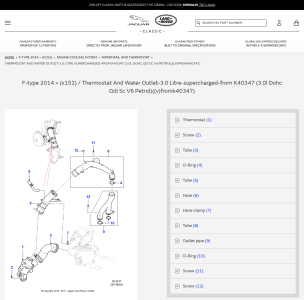
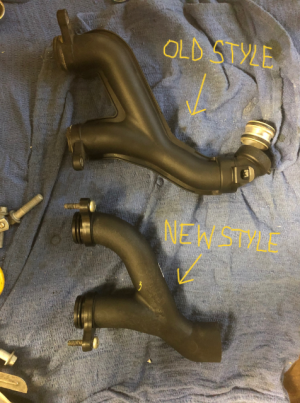
With regards to the old style plastic upper and lower coolant outlet pipes, they join together with a cooler pipe connector (short piece of aluminium pipe with two ‘O’ rings). The new style plastic pipes do not require this (see 2nd and 3rd pics below) as explained here in the section entitled ‘F-Type Coolant Leak and Lower Water Outlet Replacement’...https://classicairheads.com/blog/2020/12/29/off-topic-jaguar-f-type-supercharger-removal-coolant-pipe-replacement-and-supercharger-coupler-replacement/#water-pipe
The main dealer also informed me that part numbers LR186859 and LR186917 do not require the cooler pipe connector to join them together.
On the American forum https://www.jaguarforums.com/forum/f-type-x152-72/aluminum-coolant-pipe-recommendations-tips-267298/ this guy fitted aftermarket aluminium upper and lower coolant outlet pipes from Euro Amp and he says...
"some tips I have come across that may be helpful for others looking to do the same thing with replacing their plastic lower Y pipe and upper coolant pipes with aluminum. First and foremost, I would HIGHLY recommend getting them from @EuroAMP. I purchased through their ebay store, but you can buy them directly off their website as well. If planning to do the water pump at the same time (mine was already replaced while under warranty) they offer a complete kit. The reason I recommend them is they only carry the newer style aluminum pipe design that does not use the coupler that sits between the lower Y pipe and upper coolant pipe. Their customer service is excellent and from speaking with a few other forum members, not all the casts are created equally. Some of the aluminum casted pipes do not allow the upper coolant bolt holes to line up correctly. I have measured the ones provided by EuroAMP and they match.”
“Another tip I have learned through this process is around the lower Y pipe installation. When I first installed it, I was quick to just get it in, so the coolant overflowing from the block (yes I did a partial drain) stopped, however I noticed that the Y pipe did not appear to be seated properly. As there was no coolant leaking out, I left it as is for the time being as I am still in the process of getting the SC put back together. Today however I went and unbolted and reseated the Y-pipe again, making sure to rock it slightly back and forth, to force a better seal and sure enough, it sat further into the block than originally. I know the torque specs only require 10nm, however I over torqued them slightly to make sure again the rubber o-rings sealed in place, then backed out to re-torque to the right specs.”
“Lastly, for the upper pipe. Measure your bolt hole locations against the stock plastic one ahead of time. That last thing you want is to be stuck unable to reinstall or only get one of the mounting bolts in. I would also highly recommend adding an ever so slight bit of silicone grease to the o-ring to ensure a tight fit and seating into the lower Y-pipe correctly. It made life easier as some have mentioned they could not get it to seat properly. I believe the o-rings are meant to be a tight fit for a reason, to avoid leaks. I would also recommend doing a pressure test on the entire system to check for leaks ahead of adding coolant back into the system and then I would recommend a coolant vacuum kit to replace the coolant to help bleed the system. It is not required, but helpful to ensure any air is pushed out.”
This is the link to the Euro Amp website which shows a few different options for the upper and lower coolant outlet pipes...https://euro-amp.com/collections/hoses-pipes
During a recent discussion on this forum (Coolant Leakage Plastic Pipes) https://www.ftypeforums.co.uk/viewtopic.php?t=9031 member Crezzer posted...
Crezzer said:Genuine jaguar metal pipes
This included a photo of the OEM Land Rover aluminium upper and lower coolant outlet pipes with part numbers LR186859 and LR186917 (see first pic below). After seeing this I checked the LR part numbers with a Jaguar main dealer parts department who informed me that they crossover with and are suitable for the Jaguar F-Type including my own. The prices they gave me are:
Part number LR186859 £140.05 inc VAT.
Part number LR186917 £57.05 inc VAT. This part is currently on back order and the estimated time of arrival (ETA) is in April 2025.
They couldn’t confirm what material the parts are made of (aluminium or plastic) as that information wasn’t available to them. However, the image that member Crezzer provided clearly shows they are made of aluminium. If the information that the main dealer has given me is correct I’d consider buying these parts if I ever needed them.
With regards to the old style plastic upper and lower coolant outlet pipes, they join together with a cooler pipe connector (short piece of aluminium pipe with two ‘O’ rings). The new style plastic pipes do not require this (see 2nd and 3rd pics below) as explained here in the section entitled ‘F-Type Coolant Leak and Lower Water Outlet Replacement’...https://classicairheads.com/blog/2020/12/29/off-topic-jaguar-f-type-supercharger-removal-coolant-pipe-replacement-and-supercharger-coupler-replacement/#water-pipe
The main dealer also informed me that part numbers LR186859 and LR186917 do not require the cooler pipe connector to join them together.
On the American forum https://www.jaguarforums.com/forum/f-type-x152-72/aluminum-coolant-pipe-recommendations-tips-267298/ this guy fitted aftermarket aluminium upper and lower coolant outlet pipes from Euro Amp and he says...
"some tips I have come across that may be helpful for others looking to do the same thing with replacing their plastic lower Y pipe and upper coolant pipes with aluminum. First and foremost, I would HIGHLY recommend getting them from @EuroAMP. I purchased through their ebay store, but you can buy them directly off their website as well. If planning to do the water pump at the same time (mine was already replaced while under warranty) they offer a complete kit. The reason I recommend them is they only carry the newer style aluminum pipe design that does not use the coupler that sits between the lower Y pipe and upper coolant pipe. Their customer service is excellent and from speaking with a few other forum members, not all the casts are created equally. Some of the aluminum casted pipes do not allow the upper coolant bolt holes to line up correctly. I have measured the ones provided by EuroAMP and they match.”
“Another tip I have learned through this process is around the lower Y pipe installation. When I first installed it, I was quick to just get it in, so the coolant overflowing from the block (yes I did a partial drain) stopped, however I noticed that the Y pipe did not appear to be seated properly. As there was no coolant leaking out, I left it as is for the time being as I am still in the process of getting the SC put back together. Today however I went and unbolted and reseated the Y-pipe again, making sure to rock it slightly back and forth, to force a better seal and sure enough, it sat further into the block than originally. I know the torque specs only require 10nm, however I over torqued them slightly to make sure again the rubber o-rings sealed in place, then backed out to re-torque to the right specs.”
“Lastly, for the upper pipe. Measure your bolt hole locations against the stock plastic one ahead of time. That last thing you want is to be stuck unable to reinstall or only get one of the mounting bolts in. I would also highly recommend adding an ever so slight bit of silicone grease to the o-ring to ensure a tight fit and seating into the lower Y-pipe correctly. It made life easier as some have mentioned they could not get it to seat properly. I believe the o-rings are meant to be a tight fit for a reason, to avoid leaks. I would also recommend doing a pressure test on the entire system to check for leaks ahead of adding coolant back into the system and then I would recommend a coolant vacuum kit to replace the coolant to help bleed the system. It is not required, but helpful to ensure any air is pushed out.”
This is the link to the Euro Amp website which shows a few different options for the upper and lower coolant outlet pipes...https://euro-amp.com/collections/hoses-pipes