Boot panel removal - help please

Jaguandy

New member
20201210_120003.jpg
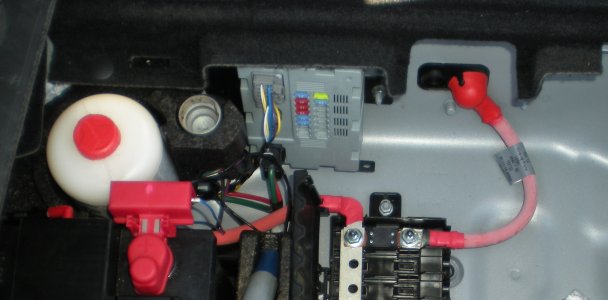
I've some noise deadening sheets left over from my speaker and door panel upgrade. I thought I'd have a go to stick some on the internal wheel arches and rear quarter panels. I don't know how feasible this will be, but I'm a bit stuck getting the side panels off.
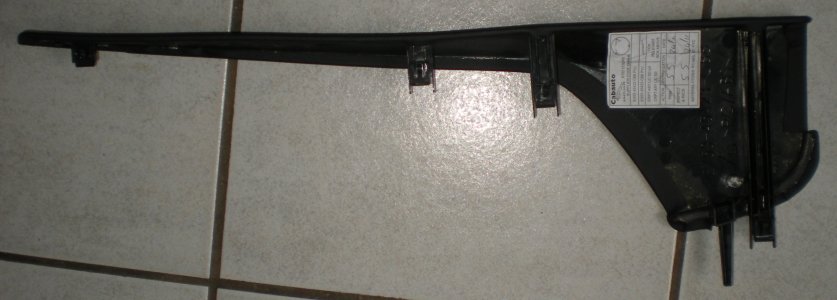
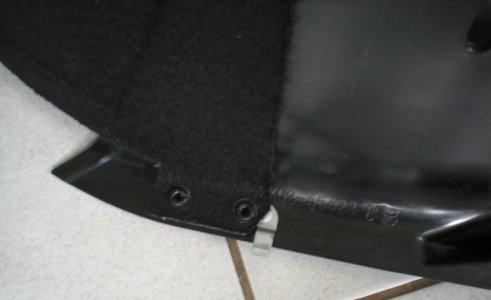
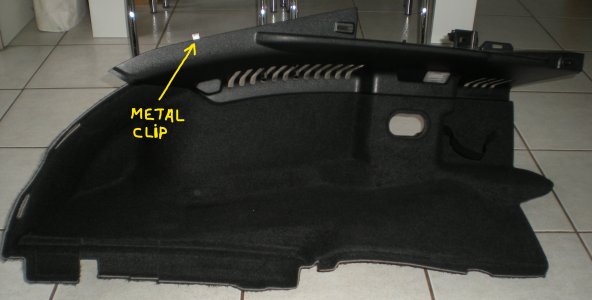
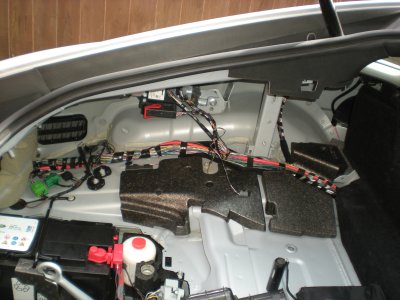
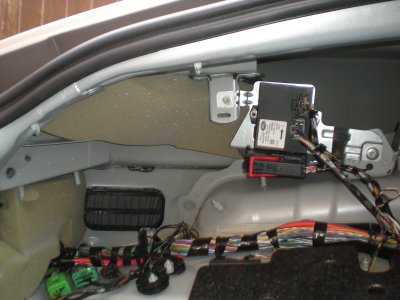
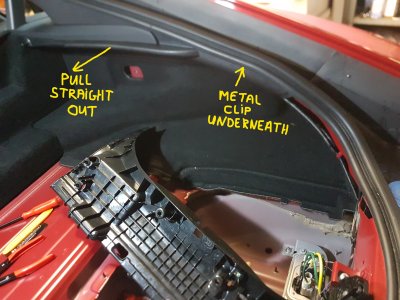
Other than unscrewing the luggage hook, do they just pull off? Or do I have to take off the panel with the umbrella storage first? Also does the plastic trim at the rear of the panel come off first, or is it part off the main carpeted panel?
Any advice welcome
 
I’ve previously removed and refit the boot interior side panel (passenger side) and there’s already some sound proofing/insulation behind it (see photos).

If you want to remove the side panels, firstly the boot floor and battery covers should be removed and also the boot storage compartment.

After this, the large plastic panel which has the boot emergency release handle embedded into it needs to be removed. To do this you detach the cable from the handle then release the fasteners which secure the panel in place. Some force has to be applied when removing the panel. (I can see from your photo that you’ve already got this far but I’ve included it for anyone else who may need it).

This is the bit that you’re unsure of.......

The interior boot panel that the warning triangle fits into does not require removal. You’ve referred to this as ‘the panel with the umbrella storage.’

As well as unscrewing the luggage anchor points on the side panels, the plastic trim at the upper of the panels needs to be removed by pulling it straight out towards the centre of the boot (see photo). Do not try to push it up, down or sideways as this could result in breakage.

The boot interior lights should be disconnected and this can be done by prising out the edge of the lights facing the front end of the car then pulling them out in the same direction. Do not try to prise and pull the lights out towards the rear end of the car as the plastic plug-in connection is directly behind the panel and will break if forced. (When refitting the interior side panels, push the light fittings into place and connect them from behind the panel first, otherwise you may not be able to find the connection through the small hole in the panel once it is fitted).

Part of the boot seal needs to be removed where the side panels fit underneath it. There is a small metal clip underneath the seal (see photo) which secures the side panel to the bodywork. Just lift it up slightly and unclip it from the bodywork. The side panel is then removed by pushing/pulling it towards the front of the vehicle whilst manoeuvring it out of position at the same time.

I’ve edited your photo to assist you and I’ve included some photos of when I removed the boot interior side panel on my car. This should give you a good idea of what the job entails.

I’ve also attached the Jaguar F-Type document......‘Interior Trim and Ornamentation – Loadspace Trim Panel Coupe – Removal and Installation.’

Hope this helps.
 

Attachments

  • 9.jpg
    9.jpg
    593.2 KB · Views: 7,724
  • 8.jpg
    8.jpg
    552.5 KB · Views: 7,724
  • 7.JPG
    7.JPG
    1.3 MB · Views: 7,724
  • 6.jpg
    6.jpg
    968.1 KB · Views: 7,724
  • 5.jpg
    5.jpg
    822.5 KB · Views: 7,724
  • 4.jpg
    4.jpg
    2 MB · Views: 7,724
  • 3.JPG
    3.JPG
    1.3 MB · Views: 7,724
  • 2.JPG
    2.JPG
    1.2 MB · Views: 7,724
  • 1.jpg
    1.jpg
    5.4 MB · Views: 7,724
  • Jaguar F-TYPE Coupe - Loadspace Trim Panel Removal.pdf
    Jaguar F-TYPE Coupe - Loadspace Trim Panel Removal.pdf
    268.4 KB · Views: 572
Wow, what a superbly helpful post. Many thanks, just what I needed. I did get hold of the full repair manual pdf download with the Jag instructions, but your photos make it so much clearer. Thanks again.
Looking at what's under there, I think adding noise proofing sheets will be rather bitty and may not have great effect, but I'll do it anyway as every little helps to reduce tyre noise. There's some really coarse surfaced roads around me.
 
@Jaguandy

Cheers 👍

I'm running Michelin Pilot Sport 4 S on the rears and don't notice any issues with tyre noise.

What tyres are you using?
 
Michelin Pilot Sport 4S as well. Tyre noise is OK on motorways and similar surfaces, but does roar more on coarse UK surfaces which spoils the music when I'm cruising, which is most of the time now the missus is with me for most journeys. Also my aged hearing seems to concentrate on the tyre mid-range noise. Doing the doors did help some, which is why I will do inside the back end. I don't expect much improvement but I have these silentcoat sheets hanging around....
It's only when I'm out on my own and going for it that I don't notice tyre noise over the louder music and/or exhaust. ;)
 
@Jaguandy

I also drive on various road surfaces but don’t get the noise issue?

I would think twice about using the silentcoat sheets behind the interior side panels as this may interfere with the car boot ventilation system as seen in my photos (vents in the bodywork and side panels).

Better to pump up the volume or switch into dynamic/active exhaust.......as long as your missus allows? :D
 
Some feedback - I managed to get 5 sheets of silentcoat in the boot area, more on the left hand side than the right due to what's accessible. Mainly inside the outer panels, some on the left wheel arch. Also some on the boot floor. What with this plus doing the doors quite thoroughly, I've got through 19 sheets of silentcoat and sheets of noise absorbing foam inside the door panels.
I think it's made some reduction of tyre noise on rough tarmac and improved the sound quality of the upgraded speakers. It'll never be a limo, and wouldn't want it to be, but I'm pleased with how it's turned out.
Thanks for all the help here and elsewhere.
 
"What with this, plus doing the doors quite thoroughly, I've got through 19 sheets of silentcoat and sheets of noise absorbing foam inside the door panels."

You could've had cavity wall insulation done instead :lol:

I take it you didn't cover any of the vented areas?

Glad it's turned out ok 👍
 
I didn't cover anything other than bare panels, I'm not sure anyone would? The silentcoat is mainly an anti-drum material with isolation properties. I believe that doing most of large panels is effective enough. Example being a small sheet of anti-drum applied by the factory in the middle of the outer door panels. That in itself will have helped with panel 'boing' and resonance behind the speaker. My applications are more extensive but not total coverage. I considered putting more sound absorbing foam everywhere, but was afraid of interfering with component cooling and window movement, so I only stuck a sheet behind each door woofer. For ideal noise reduction you need both panel deadening/isolation and absorbent foam.

It's difficult to quantify the noise reduction without measurements. Subjectively, on a rough tarmac road near me, tyre noise has gone from very loud to loud. On normal road surfaces it's just less noticeable and I can hear quiet music now (cruise driving and music not too loud when she's in the passenger seat., different when I'm alone). Thumps over drains are more muted. Perhaps 20% better all round. Of course I haven't done anything around the front wheels so that source remains the same.
 
You’d be surprised, some people would cover the vents without realising what their purpose is!

Good that you’ve noticed a slight improvement on noise reduction etc but this is a job I won’t be undertaking on my car as there’s already sufficient noise deadening material on the vehicle e.g. as shown on my photos of the reverse side of the car boot large interior side panel and the bodywork areas surrounding it.

Although audio sound isn’t absolutely top notch (as it should be on a car like this), I find it acceptable.
 
RPSN said:
Although audio sound isn’t absolutely top notch (as it should be on a car like this), I find it acceptable.

The F-Type cabin is no concert hall ... ;)
 
scm said:
The F-Type cabin is no concert hall ... ;)


It is when I give the car some welly in dynamic/active exhaust mode.....especially with the windows open ;)

I find the audio system satisfactory but on a vehicle costing approx £60-115k from new, Jaguar should have fitted a top notch system on the F-Type!
 
Mine sounds better now with the upgrades, but the upgraded centre speaker still sounds off. It is a bit too prominent, and sounds coloured, probably because it's in such a close rear plastic pocket mounting. I still prefer the stereo setting, with the fader well towards the front to emphasise the improved door speakers. Not in the same league as my Tannoy monitor golds at home, but pretty decent for such a small cabin.
 
Jaguandy said:
Not in the same league as my Tannoy monitor golds at home, but pretty decent for such a small cabin.


Great speakers those Tannoys.

I have a set of Wharfedale 505.2’s at home which produce a superb sound.......shame they couldn’t be compacted to fit in the F-Type.
 
hi,
i also removed both rear panels and found this cable disconnected. It’s fixed with all the other cables and i can't figure out where it goes. Anyonw have any idea what cable it is?

008D8CCD-60BF-44C2-B6F7-8F5871B543B7.jpeg
 
That's a cable that's connected to something when the car is transported to the dealership - nothing for the end user to connect it to.
 
RPSN said:
Great speakers those Tannoys.

I have a set of Wharfedale 505.2’s at home which produce a superb sound.......shame they couldn’t be compacted to fit in the F-Type.

You might be able to squeeze one in?

Screenshot 2021-12-29 at 17.48.38.png
 
giusemanuel said:
hi,
i also removed both rear panels and found this cable disconnected. It’s fixed with all the other cables and i can't figure out where it goes. Anyone have any idea what cable it is?


I don’t have that disconnected cable in my car boot. Some of the cables in the area are connected to the grey fusebox (top photo). Your car doesn’t appear to have this although the bracket is there (bottom photo) so I’m wondering if the disconnected cable was originally intended for it and it’s not required?

If you can’t see anywhere that it connects to and it’s not causing any electrical issues etc, I wouldn’t be too concerned about it.
 

Attachments

  • 2.jpeg
    2.jpeg
    126.5 KB · Views: 1,988
  • 1.jpg
    1.jpg
    387.6 KB · Views: 1,988
RPSN said:
giusemanuel said:
hi,
i also removed both rear panels and found this cable disconnected. It’s fixed with all the other cables and i can't figure out where it goes. Anyone have any idea what cable it is?


I don’t have that disconnected cable in my car boot. Some of the cables in the area are connected to the grey fusebox (see top photo). Your car doesn’t appear to have this although the bracket is there (bottom photo) so I’m wondering if the disconnected cable was originally intended for it and it’s not required?

If you can’t see anywhere that it connects to and it’s not causing any electrical issues etc, I wouldn’t be too concerned about it.


The grey connector you see floating around is part of the Transit mode setup. (Nothing to do with Fords!)

You can cable tie that up out the way as it will never be used again.

Small yellow wire in picture below the number 2 :
Screenshot 2021-12-29 at 21.06.49.png
 
Strange how some cars have that disconnected wire floating around in the boot and others don’t......could be down to the Pre-Delivery Inspection?
 
Back
Top