number plate lamp removal 2015 my

sobjoy

New member
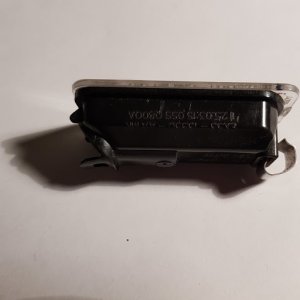
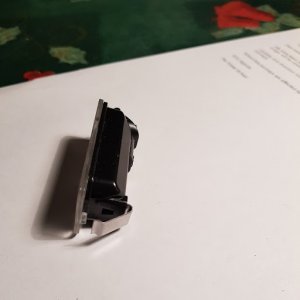
We know there is a spring clip on one end of the lamp fitting and a couple of rigid prongs at the opposite end. We suspect the idea is to insert a poking tool at the end with the spring clip and, by flexing the clip, to remove the fitting. The problem is that the plastic moulding of the lamp fitting doesn't have an aperture for any poking tool. The closest we can find on the Internet is a youtube of a guy with a New Zealand accent doing the job on an XF. It's very like, but he has the benefit of a slot for his screwdriver. And until we have the fitting removed, we don't know if we are dealing with a retaining clip that is part of the moulding or a spring-steel clip that is riveted on. We don't know if these are LED or traditional units, 'coz we haven't seen them lit. And it seems strange they both have failed, or is this 'Prince of Darkness strikes again'?

Worryingly, one of the two lamps is cracked near to the target area, so clearly a previous owner had a problem.

Any ideas gratefully considered.

Colin
 
Hi Colin,
Had the same problem myself couldn't find any information on the net about rear lamp removal, other than some have had removal issues.
Your assumptions are correct, ridged prong one end and a spring clip the other of the lamp fitting.
The lamp fitting has a highlighted area one end in the moulding, which is inviting you to poke a screwdriver in..
Don't
This is actually a spacer and as I found makes a nice cracking sound when you try to prise the lamp out as one would do on any number of similar fittings.
ATTACH]
ATTACH]

The problem of extraction occurs because the fitting is inserted into a hole in the plastic trim and not a purpose designed aperture.
The plastic trim is only 1 or 2 mm thick and the substantial spring clip has nothing to push against other than the thin edge of the aperture.
If you can't remove the fitting with your finger nails and a light force, the chances are the spring clip has opened behind the trim and is now stopping the lamp fitting being removed.(the above moulded spacer is designed to stop this happening)!
Not knowing this, I decided that the fitting was to be replaced so I used brute force, applied masking tape around the fitting to stop any surface scratches and used a variety of tools to prize the fitting out. I bent the spring enough to give an access gap and used the angle of an Alan key as a lever to compress the spring clip through the aperture.
ATTACH]

Now I know how it goes, another way might be easier next time,
 

Attachments

  • F Type old lamp.jpg
    F Type old lamp.jpg
    24.8 KB · Views: 3,166
  • F Type lamp 2.jpg
    F Type lamp 2.jpg
    21.6 KB · Views: 3,166
Sorry First post, the images are:
New fitting.
Old fitting with bent retaining spring clip.
New Fitting showing the spacer relative to the spring clip.
Hope this Helps
 
Thanks to Mantot3 on two counts:
Restoring my faith in Internet forums.
Telling me what I needed to know.
The pics are very good. The use of masking tape is a good point.
So it's time to grit one's teeth and man-up, I guess.
The remaining question is how these fittings can ever be removed non-destructively. As far as I can see, if you put one in having failed to check the bulb, you'd be back to the parts-counter for another new one. Great design.

Thanks again.
 
found this for an XF

https://www.jaguarforums.com/forum/xf-xfr-x250-44/rear-license-plate-lights-removal-tutorial-158502/

Kev
 
Back
Top