jaysjag said:
Just came across this post….
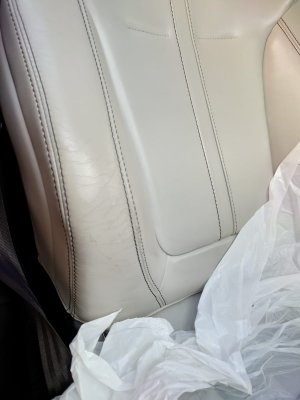
The results look amazing! I have exactly the same seat colour as you but mine are in a slightly worse condition I would say.
I have been tempted to have a go at repairing it but always chickened out, but after seeing your results I think I may have a try. Are there any other tips, pointers you can give, e.g grade of sand paper? How long it took ? Or anything else you think may be of assistance. Thanks.
It's definitely worth giving it a go yourself. This is the second time I've ever done any leather repair and the results speak for themselves.
Start by using the leather cleaner from the kit, I cleaned the ENTIRE seat for best colour match and future protection. I also cleaned the dash and door trim too.
Sandpaper wise I was using Mirka Abranet, 800 grit. It takes a little longer but doesnt tear up the surface. You will need to fill the area first, leather flexifil from furniture clinic is a good product, you can buy it on amazon for £9.50. Degrease the leather that you are going to recolour with Isopropyl Alcohol, it will take a little of the colour off so don't panic but it preps the area well. Then fill, sand, fill, sand as required. I suggest trying to keep the filler to just the cracks and scratches. If it goes everywhere then you will lose the leather grain.
Once the area is prepped mask it off well, I suggest the blue painters tape as standard white wouldn't stick. I suggest you plan to recolour an entire panel of leather, I'm not sure how well it would come out if you touched in a spot.
Degrease again lightly with IPA and then start painting. I used the foam applicator that came with the kit, I cut it up to make a couple of applicators. It's worth keeping a wet microfiber cloth to hand, if you get any on the trim or stitching it wipes off very easily when wet, you will struggle when it's dried. It dries quickly with a hair drier, but between each coat I did notice the odd bit of fluff/dust stuck to it that look like lumps, after you dry it with a hair brush it's a good time to get rid of them, a quick brush with a gloved hand (buy some decent disposable gloves) and they come off. Then just keep applying, I think I did 5 coats in the end. I left it overnight before applying the leather protection stuff that comes with it over the entire seat.
Biggest bit is don't panic. When you first put it on you will probably do what I did and worry that it won't match, the colour changes a lot as it dries. Just focus on the prep work and masking stuff up and you won't have any issues


 …….
…….