I have noticed one or two posts regarding the fitting of dash cams or other electrical devices on an F Type.
Having recently delved behind the carpets and wiring of my 2014 V6S I decided to post up what went on just in case it helps anyone else who may be tempted in the future.
I must point out that I am not an auto electrician and any work carried out has to be at your own risk. I noticed that the Blackvue camera that I was installing had a tag on the supply lead stating that cutting the lead would invalidate the warranty!
I decided that the easiset place to find a suitable fuse location for my purpose would be the passenger footwell fuse box as it is closest to where the dash cam cable emerged from the run around the windscreen and A pillar.
The fuse board on my car is under the floor mat but I think on more modern versions it has been relocated but I am sure the principles will be similar.
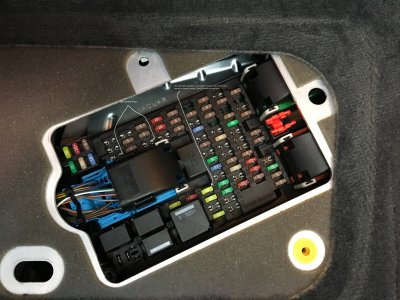
Picture one
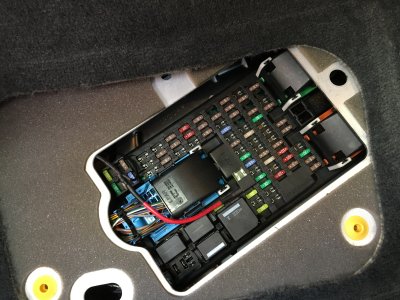
This shows what was revealed once the fuse board covers were removed. I have written on the photo but it seems to have come out in micro dot! The 2 left hand empty fuses I found were live all the time whether ingnition was on or not. They may cut off on car lock up I don't know. The arrow head is pointing at the live pin of the fuse pair.
The right hand fuse (fuse 52) is normally feeding the Centre Console external accessory socket and as this is where my origanl installtion derived power I thought this would be a good place to start. The arrow head is pointing at the 'switched live' pin of the fuse. This is live when accessories are on and when the engine is fired up.
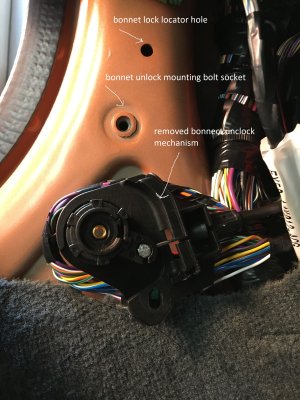
The next part of the exercise was to find a suitable ground/earth point. I decided to remove the side panel alongside the passenger footwell. It would allow better access to run cables and possibly assist in a suitable ground. This panel is a bit of a pain to remove as I had no idea where it was retained. I removed the bonnet release handle with a TORX screw. Once that was off the panel is held down by the sill plate which can be gently prised up with a wide blade. Once that is released the panel is held at its top edge by a trim pin into the A frame metal work. I had to pull and manipulate it down and out. It also has a tongue on its right hand top edge which plugs into a slot of the passenger well carpet/panel. Sounds more complicated than it was. Once released you can see the detail shown in picture 2.
Picture two
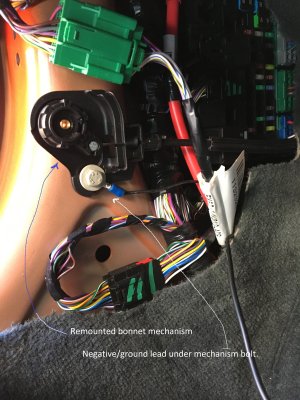
This shows the boot release mechanism which I have unbolted from its position as I thought that the bolt was adequate to carry the <2 Amps requirement for a dash cam. There is a hole in the metal work just below the mechanism which the more adventurous of you could drill near by and fit a more suitable termination should you feel like it. I don't like drilling uneccessarily
Picture three
I used a crimp on/soldered eyelet onto a length of black wire as my ground termination. Once that was made I reattached the bonnect release with its bolt and the eyelet. This photo shows the reassmebled unit. The yellow fuse is the 20 Amp fuse that feeds the Accessory socket.
Picture four
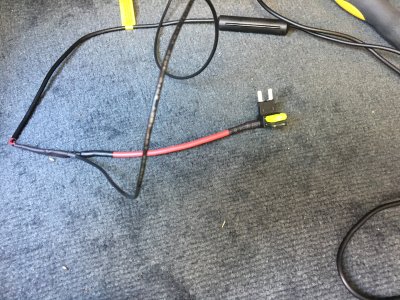
I removed the old 'cigar lighter' plug from the dash cam lead but left the inline fuse in position. The wiring in the fuse carrier is very thin and I did not want to disturb it so chickened out! The wires I joined after the fuse was done with soldered joints and a fair bit of shrink on sleeving which does provide a good degree of electrical and mechanical protection. The lead is shown in this photo. Please note the car carpet is in pristine condition and why it looks stained is one of the quirks of an iphone!!!
Picture five
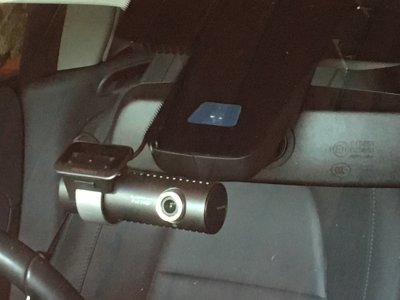
Once all the trim was installed, handles reattached the completed job looked like this photo.
Once complete a road test showed it all worked as intended and no more trailing leads inside the cabin.
Hope that is of some help.


