First Year Niggles

Jeff-W

New member
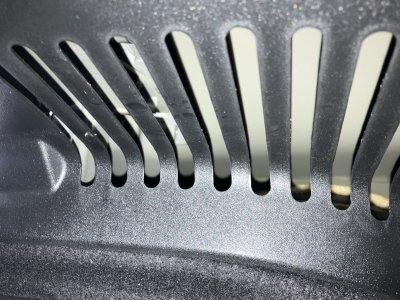
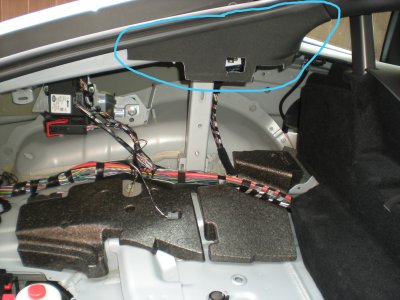
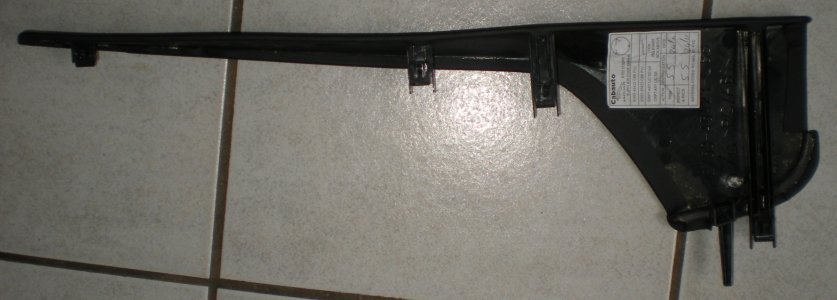
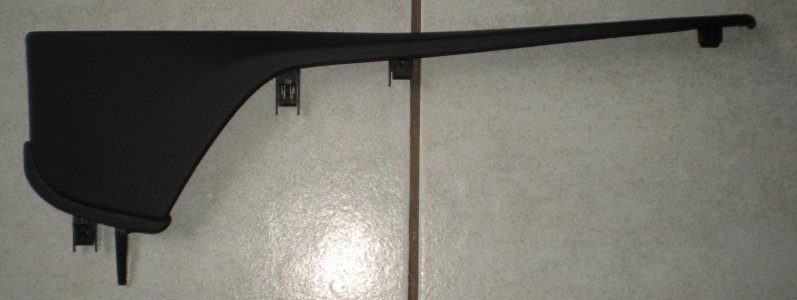
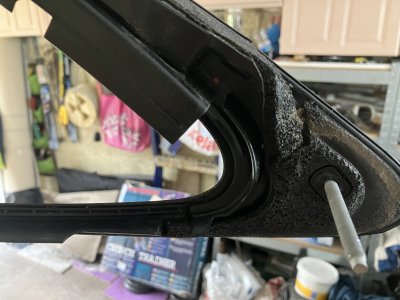
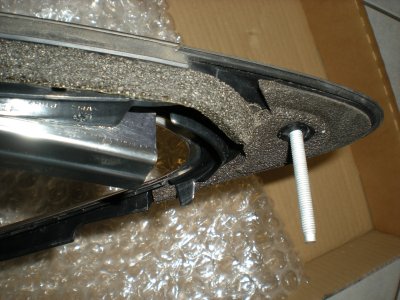
I noticed that the driver's rear side window trim was becoming detached from the bodywork a few months ago - the lower section immediately behind the driver's door, which is horizontal on the rear wheel arch. I had also detected some vertical score marks at the very front of the driver's window, indicating some abrasion during window opening/closing. With these in mind, and given that there was also a dashboard rattle audible, if I left the radio off and kept the engine note down, I booked in with the Cheltenham and Glos Marshalls dealership, with whom I had taken out the service plan from new. They asked if they could have the car for a day for investigation - no problem.

They have agreed to investigate the rattle, fix the trim, replace the window seals and polish out the marks on the driver's window - or replace the glass - all under warrantee. I was pleasantly surprised. The car goes in for all this, and the first service, on 4 March and I will report back.
 
As I understand it, vertical scoring on the windows is a known problem and resolved by a change to the design of the window mechanism to prevent the retention of grit between the glass and door trim.

The replacement of the part in the mechanism should be covered by warranty, however the same cannot always be said for the glass - I was buying KP21ZDF until I saw the scoring on the windows - 8-10 inch multiple vertical scratches - dealer told me they met Jaguar Approved Used standard and quoted over £1100 to replace both - remember "When you can’t tell it’s used it’s Jaguar Approved..." Needless to say I walked away.
 
WRT the window rubbers, I gave up trying to source yhe actual upgrade as my Mrs car has a few scratches but her 15reg seals are the same as my facelift 17 plate seals. I just pop them out ever few months and give them a good clean in a bucket of soapy warm water, 5 minute job with only 1 retaining screw on the end.
 
So, by way of an update …

Jag Cheltenham had asked to keep the car over last weekend to finish working on the dash rattle, and I had no problem with that as I understood they probably had a lot of work to do for the investigation. I was assured that the other issues were complete (vide supra).

At the dealership today I could see that the window seal had been changed, that the service was documented and that the rattle had been thoroughly investigated (turned out to be 2 causes - a brake servo contacting a scuttle panel and some loose panel clips under the steering wheel trims). Rattle has gone.

Regrettably, although the QA check had been signed off, the trim on the driver’s side rear window had not been bonded properly (it was visually wrong from yards away!) and, even worse, was now interfering with the door trim on open/close. I rejected this and they have agreed to pick the car up, fix it, and drop it back at my convenience, rather than my wife and I have to drive the distance in 2 cars for a second attempt at this fix. They could have just replaced the trim piece, as they had said they would likely do, and got it done first time. Not impressed with QA having released the car back to me.

Otherwise fine, and all covered under warrantee.

Minor rant now over! Still love the car to bits.

Jeff.
 
So, fast-forward a year to service number 2. Both rear side window trims were visibly lifting away from the car at the rearmost point (the sharply curved section). The car was returned to me with “window trims re-seated and now flush to body” in the service report.

They weren’t - they were lifted exactly the same amount as when I took it in.

Service rep was shown the car before I drove away - videos taken - parts ordered within 2 hours for fitting at my convenience in near future. Why not do this in the first place? It was clearly a warranty issue as they had replaced the NS trim last year when it had lifted.

To be continued ….
 
Hey @Jeff-W

Thanks for posting this, really useful. My car is just over 9 months old and I’ve got the same trim lifting (by the door) on the drivers side. I’ll pop into the dealership soon and see what they say.
 
Incredible that this window trim issue still is a thing after 10 years of production. It seems like most coupés are affected by this more or less. Maybe because of some slight body flex that causes this over time. My trim is a bit raised on one side of the car but fortunately so little that it's hardly noticeable and it hasn't changed for years.

I've read about F-Type owners getting this window trim replaced over and over with the issue just returning. The best solution seems to be to glue it in place.
 
Yeah I suspect you’re right MajorTom, it certainly wasn’t there when I got the car and I’ve put 5000 miles on it in those 9 months so suspect it’s just worked loose. Will see if dealer will repair/replace and if not or poor will sort myself.

As you say it’s a shame it’s still an issue.
 
Same here. The trim curved part on both sides is slightly raised but it doesn't really bother me. Considering how it's a massive, single piece and how it's firmly mounted on the car, the issue is unlikely to progress. I was quoted £600 each side plus labour to have them replaced. Nah. I'm good.
 
These issues with the chrome window finisher lifting away at certain points (usually below the rear quarter window front section and also at the finisher’s rearmost point i.e. the sharply curved section) are caused by poor design and adhesive methods.

I’ve previously repaired the chrome window finisher on my car.

This is when it lifted on the offside (RH) below the rear quarter window front section... https://www.ftypeforums.co.uk/viewtopic.php?t=4174

I also had a go at it when it lifted on the nearside (LH) sharply curved section as shown here....
https://www.ftypeforums.co.uk/viewtopic.php?p=63908#p63908

Since doing those repairs I bought a new offside (RH) Jaguar OEM chrome window finisher to keep as a spare and it could be that the sharply curved section is lifting away from the car body due to the nut that holds it from slackening etc? However, the area where it lifts under the rear quarter window front section is definitely an adhesive issue.

Here’s a couple of pics of the underside of the new finisher which show the threaded bolt that secures it to the car....
 

Attachments

  • 2.JPG
    2.JPG
    1.3 MB · Views: 1,180
  • 1.JPG
    1.JPG
    1.3 MB · Views: 1,180
RPSN said:
Since doing those repairs I bought a new offside (RH) Jaguar OEM chrome window finisher to keep as a spare and it could be that the sharply curved section is lifting away from the car body due to the nut that holds it from slackening etc? However, the area where it lifts under the rear quarter window front section is definitely an adhesive issue.

Here’s a couple of pics of the underside of the new finisher which show the threaded bolt that secures it to the car....

Interesting photo, did you carry out the replacement of your chrome trim? I wonder if there's a way to access that bold and tighten it up.
 
There's been no need for me to replace the offside (RH) chrome window finisher with the new spare one that I have, as the repair job I did with the black CT1 sealant and adhesive is still holding strong. That stuff is the dogs balearics and it will also seal under water!

I’ve attached a video of the F-Type Coupe window finisher removal and installation. At first I thought the guy was removing the nut from the long bolt at the rear side of the finisher (sharply curved section) starting from 1:13, but on closer inspection he appears to be removing the bolt/spacer that is located between the rear quarter glass and the body as shown here https://www.ftypeforums.co.uk/viewtopic.php?p=80271#p80271
I'm starting to wonder whether or not there is a nut on it or does the long threaded bolt just fit into the hole in the bodywork?

https://youtu.be/EQ-P8Xjyh24

I’ve also attached the TOPIx document ‘F-TYPE (X152) C-Pillar Trim Panel - Coupe - Removal and Installation’ as this shows the relevant trim which may need to be removed to access the nut if there is one?

Furthermore, I’ve included a photo of the F-Type on the assembly line where it shows the hole (circled) in the bodywork which is for the long bolt at the rear side of the finisher (sharply curved section).
 

Attachments

There is a 10MM nut on the bolt. You need a long box type spanner to get to it.
It does involve stripping the boot panels or an easier way if you are nimble :)
Get in the boot on your back legs dangling outside. There is a plastic grill in mine that does nothing.
Hacksaw blade one of the legs and it will pull out of the way, then you can get a long thin extension bar and 10mm box spanner in.
The water is not a leak it's chucking it down.
 

Attachments

  • IMG_0489.JPG
    IMG_0489.JPG
    8.6 MB · Views: 1,092
GBH said:
There is a 10MM nut on the bolt. You need a long box type spanner to get to it.
It does involve stripping the boot panels or an easier way if you are nimble :)
Get in the boot on your back legs dangling outside. There is a plastic grill in mine that does nothing.
Hacksaw blade one of the legs and it will pull out of the way, then you can get a long thin extension bar and 10mm box spanner in.
The water is not a leak it's chucking it down.

Thanks for the info and pic....especially as its pouring down!

The plastic grill that you mention is for ventilation as there are ventilation outlets installed in the left and right rear quarter panels behind the trim at the rear of the boot (near the bumper) shown here....https://www.ftypeforums.co.uk/viewtopic.php?p=64374#p64374

I was thinking there may have been an easier way to access the nut (without causing any damage or stripping out the boot interior large side trim panels etc) by removing the C-Pillar trim panel instead? It appears to cover the area where the nut is as shown in the TOPIx document I posted earlier (see attached images) and the job time given is 0.5 hrs.

I’ve also attached some pics of the C-Pillar trim panel on my own car from when I removed the boot interior trim a few years ago.... https://www.ftypeforums.co.uk/viewtopic.php?p=49290#p49290

I can now see that you’ve done this job before https://www.ftypeforums.co.uk/viewtopic.php?t=7238 so it looks like that method won’t work?
 

Attachments

  • 6.JPG
    6.JPG
    1.2 MB · Views: 1,021
  • 5.jpg
    5.jpg
    593.2 KB · Views: 1,021
  • 4.jpg
    4.jpg
    552.5 KB · Views: 1,021
  • 3.png
    3.png
    164.4 KB · Views: 1,021
  • 2.png
    2.png
    168.3 KB · Views: 1,021
  • 1.png
    1.png
    158.2 KB · Views: 1,021
Fantastic information, RPSN! If only someone was able to get to that nut and confirm that tighting it up get the curved part of the trim back where it should be that'd be awesome.
 
👍

Yes, that would be ideal.

Members GBH and Stu67 have previously removed and replaced the trim surround (window finisher) on their cars as shown in this topic ‘Trim removal advice wanted’.... https://www.ftypeforums.co.uk/viewtopic.php?t=7238

It would be great to hear their opinions on that nut and whether or not they think it could be working loose and causing some of the window finishers to lift away from the bodywork in that area i.e. the rearmost (sharply curved) section? If so, it could be tightened up to pull the finisher back in.

I may be wrong and stand to be corrected, but it looks like you’d be able to access the nut by removing the C-Pillar trim panels as shown in my previous reply which includes the TOPIx diagrams and my own pics? If so it would be easier than stripping the boot trim panels as they did when they replaced the window finisher. It would also be great to hear their views on this?
 
I firstly did start removing parts near the C pillar area but found I was getting close to the airbag.
I decided then to remove the rear panel with the escape handle and the plastic side trim so removing the nut was easy.
After I had refitted everything I noticed that the curved exterior trim bit was a bit proud and needed a bit more tightening.
I went the easier way to retighten but it does nothing so I put a bit of 3m tape behind it.
Here are 2 pictures to get to the nut the easier way, the grill is not the first one you see in the boot, but the one beneath the shelf holder.
The nut is a long way in I used a couple of long thin extensions and a box spanner.
You can also see how close the rear airbag and anchor is.
 

Attachments

  • Grill.JPG
    Grill.JPG
    3.9 MB · Views: 844
  • Nut.PNG
    Nut.PNG
    2.6 MB · Views: 844
From a simple mechanical perspective tightening a locating bolt at the extreme rear of the trim cannot have any effect on the front lower part where it’s lifting. If you press on the trim over the bolt and it doesn’t move inwards then there’s no point in stripping trim and over tightening it as it’s clearly already tight. You risk shearing it or grinding it into bodywork, or even further flexing the raised part outwards as you deform the profile.
The solution, if keeping the existing trim, is clearly to fully remove and bend it slightly (if you’re brave), but easier to bond the offending part down as others have done.
The only reason to access the rear bolt would be to loosen to get better access to bond it.
I stand to be corrected of course but have a life of this sort of fix and mods.
 
I agree, tightening the nut does nothing.
I had to change my trim as lowlife tried to get in, they had a screwdriver and prised the glass against the trim.
Bent the trim and broke the glass, it was cheaper to source the glass and trim than pay the excess.
New glass and used trim which was as new.
There is nothing to stick the rear of the trim it's just foam. I reckon it deteriorates and goes flat.
Here is a picture of mine I repaired it and kept as a spare.
 

Attachments

  • IMG_0493.JPG
    IMG_0493.JPG
    3.9 MB · Views: 801
Must say, although I don't think I have this problem, I think it's great that really clear and useful advice is being shared here. Proper forum!
 
Back
Top