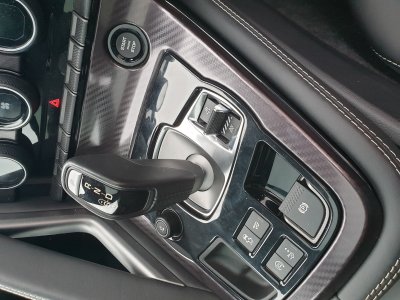
So - i had to do this job this weekend on my MY15 so I could swop the bronze-coloured Dynamic / Winter switch for a silver one; as i continue to tweak my F-Type to be how i want it.
As I was reading this thread I gathered some pictures along the way to hopefully make someone else’s life easier than mine!
Remove the trim each side of the centre console – close to the drivers left knee and passenger’s right knee (for Right hand drive car). The trims are about 10cm high and about 1m in length. They are quite flexible - so you need to be careful with them. The trims are held in place with about 12-15 spring clips – so some gentle leverage with your hands can pop them off without breaking them. You might need to have the ignition on and move the seat around a bit to get some good access. The rear-most clip is not actually a clip – but a lug that has a flange on it – and to get this out you need to slide the trim towards the rear of the car horizontally at the same time as pulling it out:
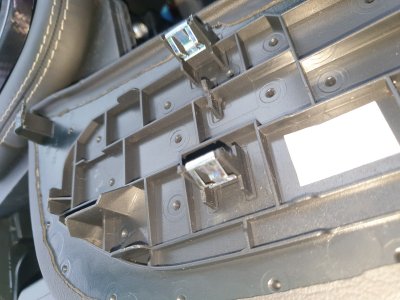
With the trim off – there are two Torx screws (T30) on each side that have to be removed. They were black on my car: one screw is level with the front of the gear-lever assembly:
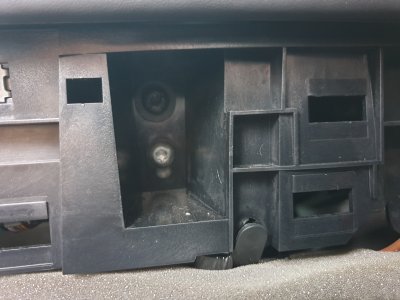
and the other one is in line with the rear of the assembly. There are also three silver ones on each side too – but don’t get drawn to these; they do not need to be removed to do this job:
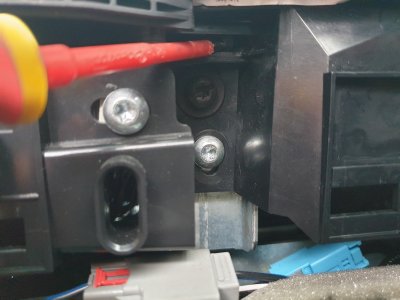
Then you need to remove the upper cover that holds the start/stop button and cigarette lighter (?!?) The easiest way to do this is with your finger nails; anything else will actually mark the trim so best avoid using anything else. There are 4 spring clips holding it down so i started mid-way down the driver’s side and then worked around the rearward section and it popped off nice and easily. You can then detach the plug from the back of the start/stop button and the charging point. If you are replacing the start/stop button – then you can stop here!! The button pops out easily with some soft springs easily.
There are two screws low down inside the dash - behind the Start/Stop button… ignore these – they do nothing and you will undo them – find they don’t help and then risk losing them down the gaps!
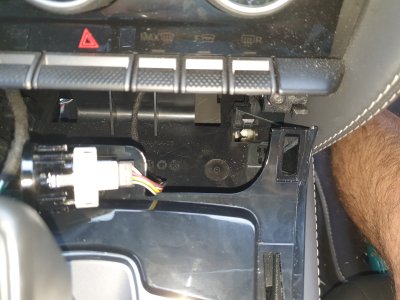
There are two small Torx screws (T15) at the rear of the assembly that need to be removed. They are deep down so you need a long torx bit – and magnetic so you don’t lose them.
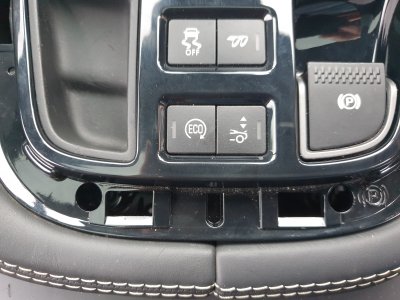
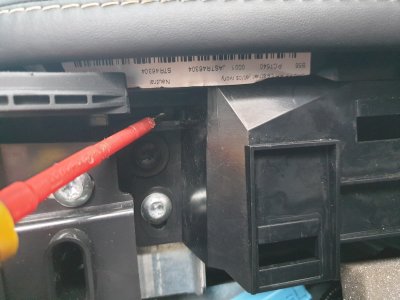
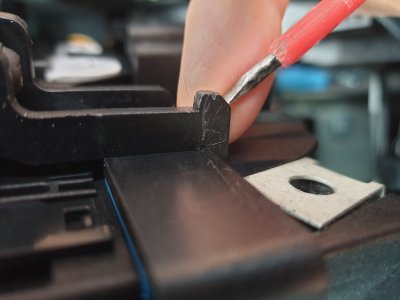
Now comes the famous “clips”: They are not clips at all – they are “Lugs” on the plastic that hold it in place until the two black torx were put in. You are not actually trying to “flick them” – you are trying to apply pressure and leverage to the bottom of them – so the plastic bends and the whole unit pops out. I tried for ages and could not feel anything moving. I also tried to remove the assembly unit before I had removed the two Torx bolts – so nothing was ever going to shift. Having got them out – I now understand why no one can explain how they did it… Brute force is the answer

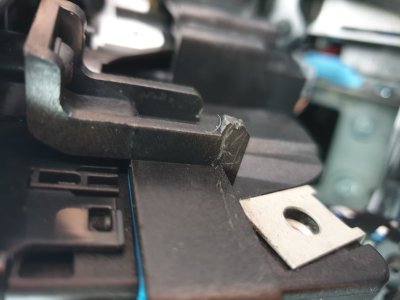
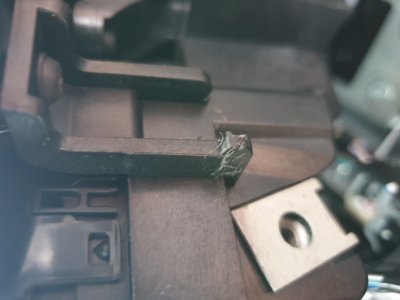
So – having found the Lugg – you need to apply inboard and upward pressure to bend the plastic and force the rear section upwards.
The front half of the assembly comes easily as there is nothing to stop it.
on the rear half of the assembly you need to push it upwards as there is nothing to hold on to without deforming the plastic - as the top section is not very strong.
Once i got it all apart – I decided to remove the lugs completely with a pair of side-cutters – and then re-assembly and re-removal later is super-easy!
This is a Truly terrible piece of design with no though about the poor sod who would have to work on the car years later!
Once the centre section is loose – there are about 6-8 sets of cables with plugs & sockets on the bottom of the assembly and so depending on the job you are doing you may need to remove some or all of them to get enough access.
Having done your job - refit everything in reverse.


